How to Remove Water Stains from Interior Log Home Walls: Swedish Cope and D-Log Restoration Guide

If you own a Swedish cope or D-log home, there's a good chance you've noticed something unsettling on your interior walls — dark streaks running down between the logs, cloudy white residue that won't wipe off, or amber-brown stains creeping along the grain. These aren't just cosmetic blemishes. They're the visible evidence of a water intrusion problem that has been silently developing for months or even years.
Water stains on the interior of a log home are one of the most common — and most misunderstood — problems we encounter. Homeowners often try to sand them out, bleach them, or paint over them, only to watch them return within months. That's because the stains themselves are just the symptom. The real problem is water getting between the logs and carrying dissolved wood sugars, tannins, and natural oils to the surface, where they're deposited as the moisture evaporates. Without addressing both the stains and the source of the water, you're fighting a losing battle.
In this comprehensive guide, we'll walk through exactly what causes these interior water stains, why they're so stubborn to remove, the multi-step process required to truly eliminate them, and — most importantly — how to seal your log home properly so they never come back.
The "Chink-Less" Log Home Problem: How Kit Homes Become Chinking Projects
To understand why interior water stains develop, you first need to understand how many of these log homes were built — and the fundamental design flaw that makes them vulnerable.
Swedish Cope and D-Log Construction
Swedish cope logs are milled with a concave groove (the "cope") along the bottom of each log. This groove is designed to nest snugly over the rounded top of the log below, creating a tight, interlocking fit. The idea is that the logs fit together so precisely that no chinking is needed — a "chink-less" design.
D-logs are milled flat on the interior face (giving rooms a flat-walled appearance) while keeping a rounded or natural profile on the exterior. They typically use tongue-and-groove or spline joints to create tight seams between courses. Like Swedish cope, D-log homes are often sold as kits that require no chinking.
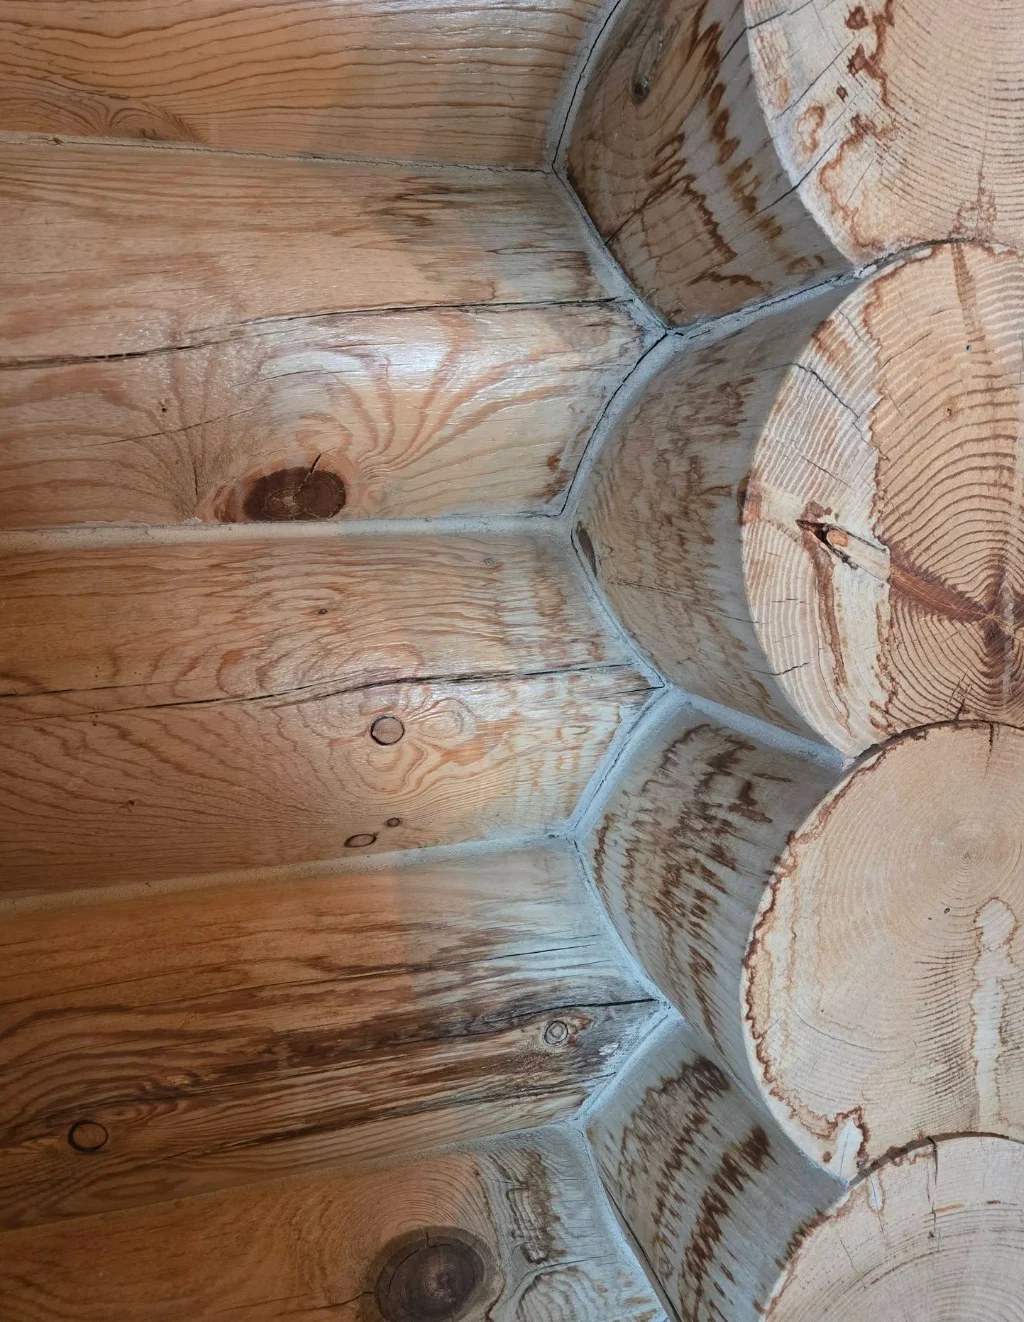
Swedish cope log corner detail: Dark tannin and sugar deposits are clearly visible bleeding down between the log courses. Notice how the staining concentrates at every joint where water enters between the cope and settles — these marks trace the exact path water has traveled through the log wall over many seasons.
Why "Chink-Less" Becomes "Needs Chinking"
Here's the reality that log home kit manufacturers don't always explain: every log home settles. It doesn't matter how precisely the logs were milled or how tight the fit was on day one. Over time — typically 3-7 years after construction — several forces conspire to open gaps between logs:
- Settling and compression — The weight of the structure compresses the logs. A two-story log home can settle 4-6 inches or more in the first few years. As the wall height shrinks, the logs shift and the original tight joints open up.
- Shrinkage from drying — Freshly milled logs contain significant moisture. As they dry to equilibrium with their environment (which in Colorado's dry climate can be as low as 6-8% moisture content), the logs physically shrink. A 12-inch diameter log can shrink up to half an inch in diameter as it dries.
- Seasonal expansion and contraction — Logs expand when they absorb moisture in spring and summer, then contract as they dry in fall and winter. This constant cycling slowly works the joints open.
- Checking and twisting — As logs dry, they develop checks (cracks) and can twist or warp slightly, changing the geometry of the joints.
The result is predictable: a home that was sold as "chink-less" now has gaps ranging from hairline cracks to quarter-inch openings between every course of logs. Rain, snowmelt, and wind-driven moisture find these gaps and begin saturating the wood from the outside in. On the interior, you start seeing the evidence — water stains.
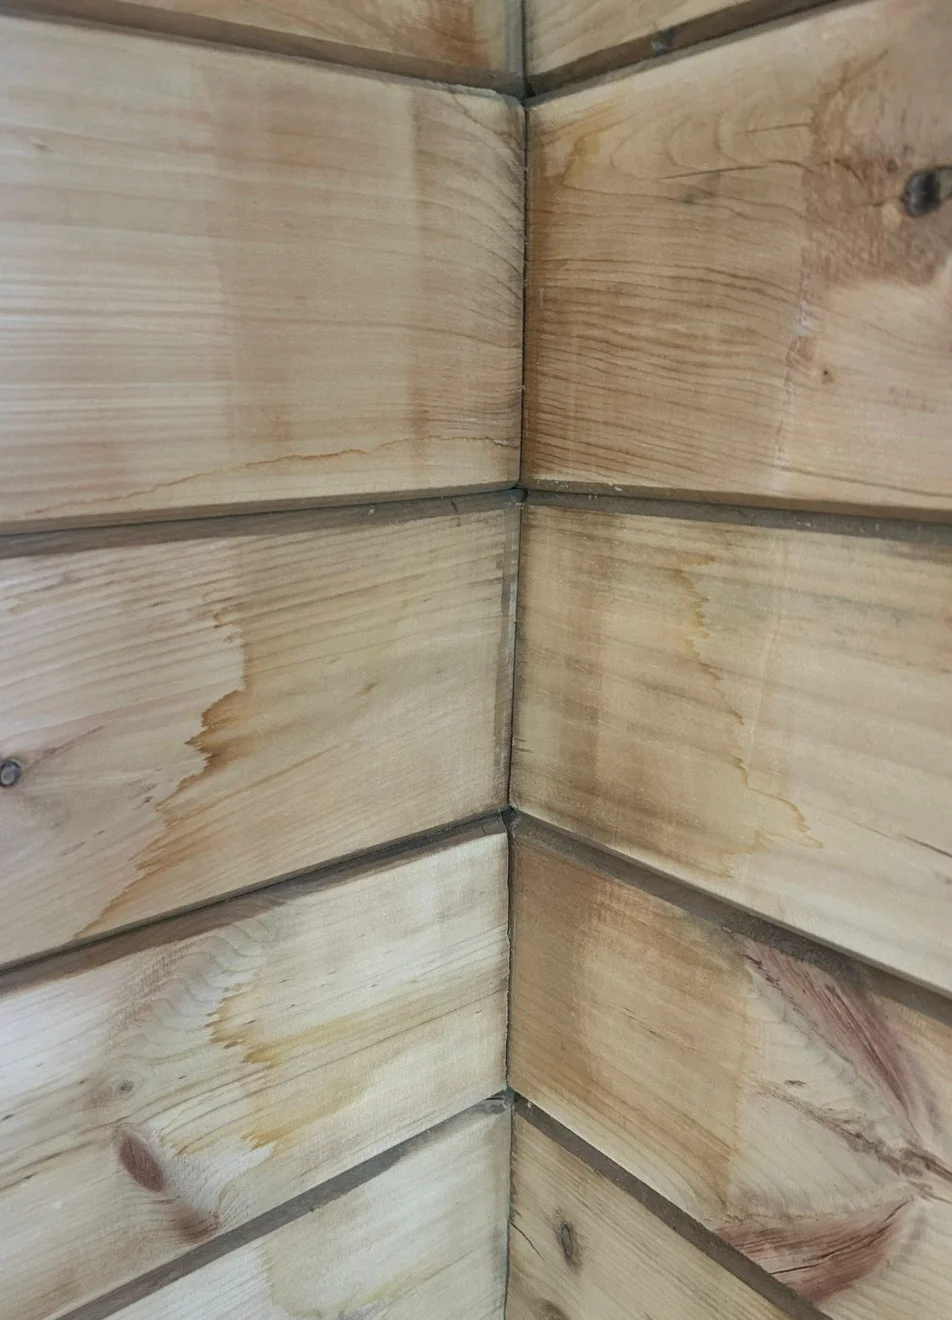
D-log corner with water run stains: You can clearly see the amber-brown water stain trails running vertically down the corner joint where the two walls meet. Each stain line traces the path of water that entered from the exterior, traveled between the log courses, and deposited dissolved wood sugars and tannins as it evaporated on the warm interior surface. This corner shows years of repeated water intrusion cycles.
What Are Interior Water Stains, Really? The Science Behind the Marks
Interior water stains on log homes are not simple water marks like you'd see on a piece of furniture. They're fundamentally different — and far more difficult to remove — because of what's actually in them.
The Chemistry of Wood Extractives
When water penetrates between the logs from the exterior, it doesn't just pass through and evaporate cleanly. As water moves through the wood, it dissolves and mobilizes the natural chemical compounds inside the wood — substances that wood scientists call "extractives." These include:
- Tannins — Polyphenolic compounds that give wood its brown color. Pine, spruce, and cedar (the species most commonly used in log homes) all contain varying concentrations of tannins. When dissolved in water, tannins create dark brown to black stains.
- Wood sugars (hemicelluloses) — Broken-down sugar molecules from the hemicellulose component of wood. These create amber to yellowish stains and leave a slightly sticky residue when they dry.
- Resins and oils — Natural pitch and resin compounds, particularly abundant in pine species. These create glossy, amber-colored deposits that are extremely resistant to water-based cleaning.
- Lignin degradation products — As UV and moisture break down lignin, the byproducts dissolve in water and create yellowish-brown discoloration.
- Iron tannate compounds — When tannins in the wood react with iron (from nails, fasteners, or iron-rich water), they create blue-black stains that are among the most stubborn of all wood discolorations.
Here's the critical point: when the water evaporates, these dissolved compounds don't evaporate with it. They're left behind on the wood surface as concentrated deposits. Each time water enters and evaporates, another layer of extractives is deposited. Over months and years, these deposits build up into the deep, stubborn stains you see on your interior walls.
This is why you can't simply wipe water stains off with a damp cloth. The stains aren't sitting on the surface — they've been absorbed into the wood fibers and chemically bonded with the cellulose structure. Removing them requires breaking those chemical bonds and physically removing the stained wood layer.
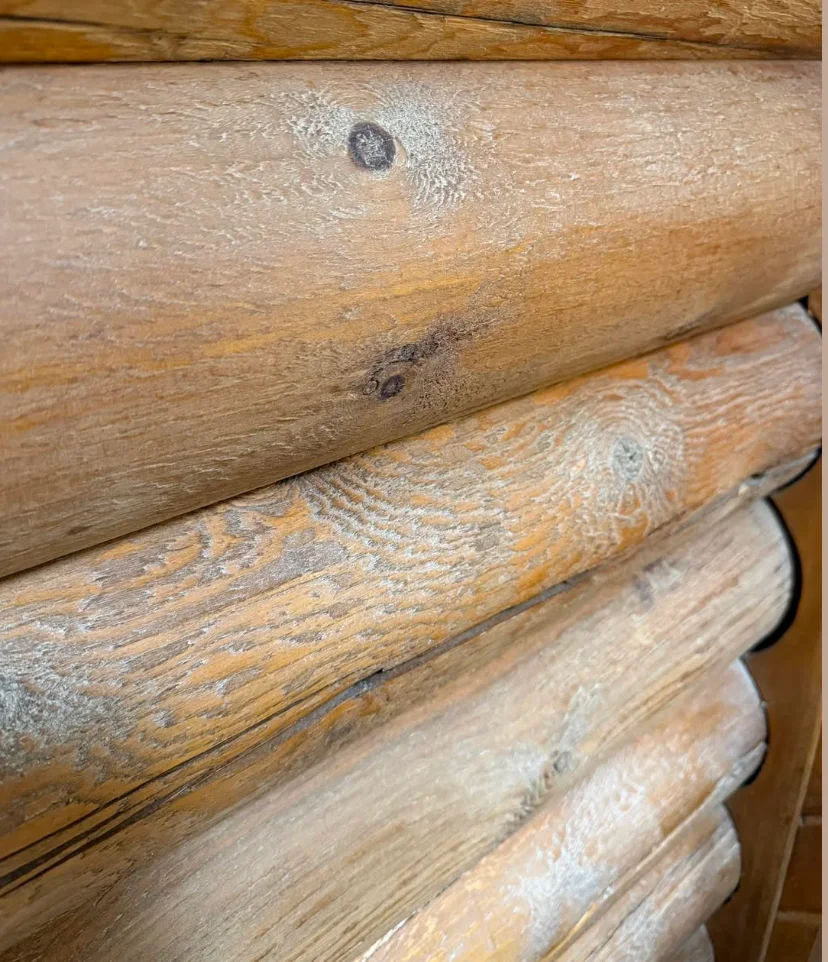
Severe water damage with mineral deposits on round logs: This is an advanced case showing years of unchecked water infiltration. The white, chalky residue across the log surfaces is a combination of dried wood sugars, mineral salts, and crystallized extractives that have been repeatedly deposited as water evaporated from the wood surface. The grey discoloration indicates areas where the original finish has been completely compromised by persistent moisture exposure.
Identifying Water Stains on Different Log Profiles
Water stains present differently depending on your log profile, and understanding the pattern helps diagnose where water is entering your walls.
Swedish Cope Log Staining Patterns
On Swedish cope homes, water stains typically appear as dark streaks running down the face of the logs directly below each horizontal joint. The concave cope channel acts like a gutter — water enters from the exterior, runs along the channel, and drips out on the interior face wherever the joint has opened up. You'll often see a consistent pattern of staining below every joint on a given wall, with the worst staining on walls that face the prevailing weather.
At corner intersections, the staining is often most severe because the corner notches create complex geometries where water can pool and travel in multiple directions before finally reaching the interior surface.
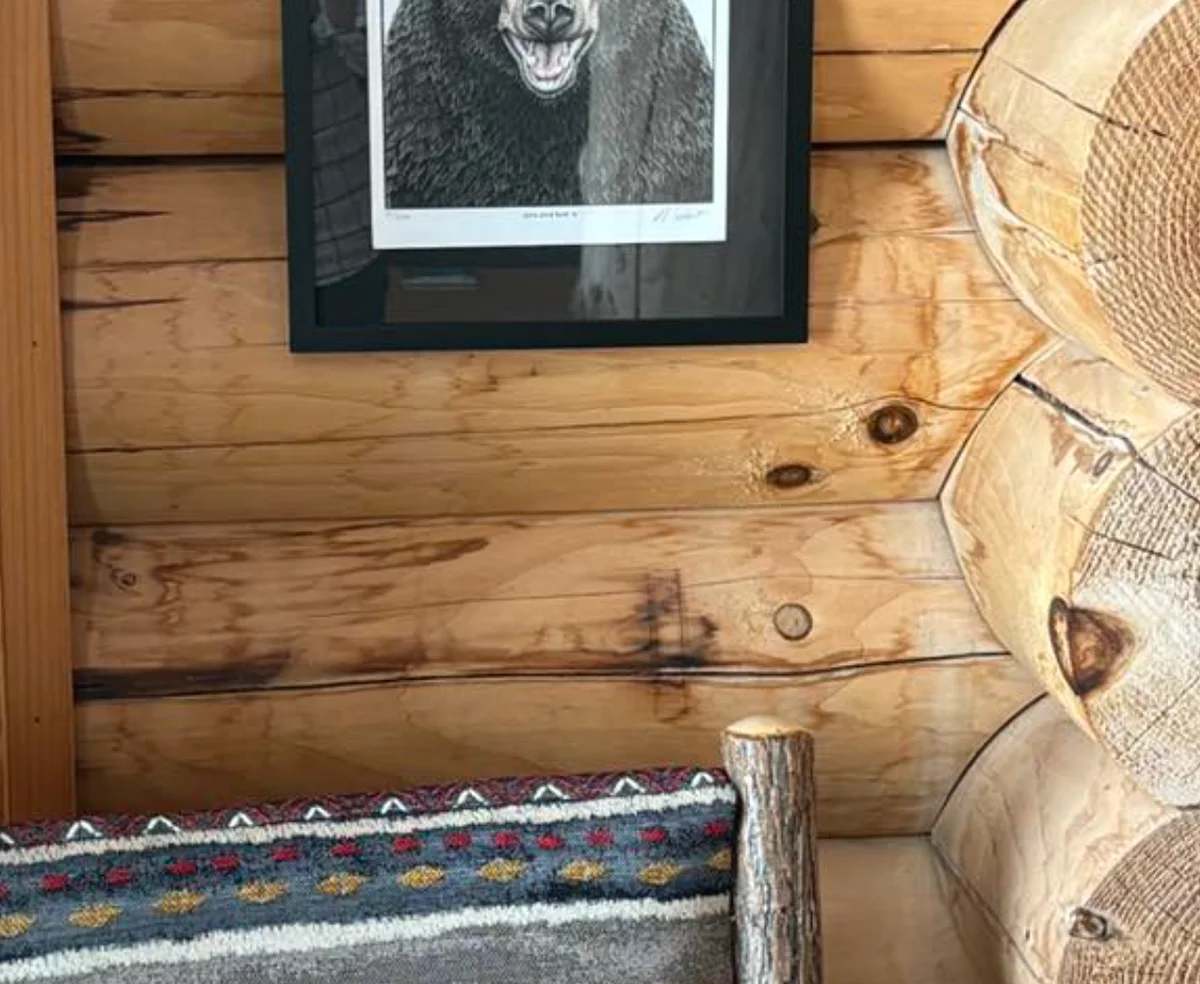
Swedish cope interior with water staining in living area: The dark horizontal streaks between the log courses are unmistakable signs of water intrusion. Notice how the staining is concentrated at the joints where the cope grooves have opened up over time — water enters from the exterior, dissolves wood tannins and sugars as it travels through the joint, and deposits them on the interior face as it evaporates. These stains have built up over multiple seasons of exposure.
D-Log Staining Patterns
D-log homes show water staining somewhat differently because of their flat interior face. Stains typically appear as vertical drip lines running down the flat wall surface from the horizontal joints. Because the interior face is flat, gravity pulls the dissolved extractives straight down, creating clear, defined streak patterns that look almost like someone dripped tea or coffee down the wall.
In bathrooms and kitchens, D-log interior staining can be especially pronounced because the warm, humid indoor air creates a temperature differential that draws moisture through the wall from the cold exterior — a process similar to condensation on a cold glass.
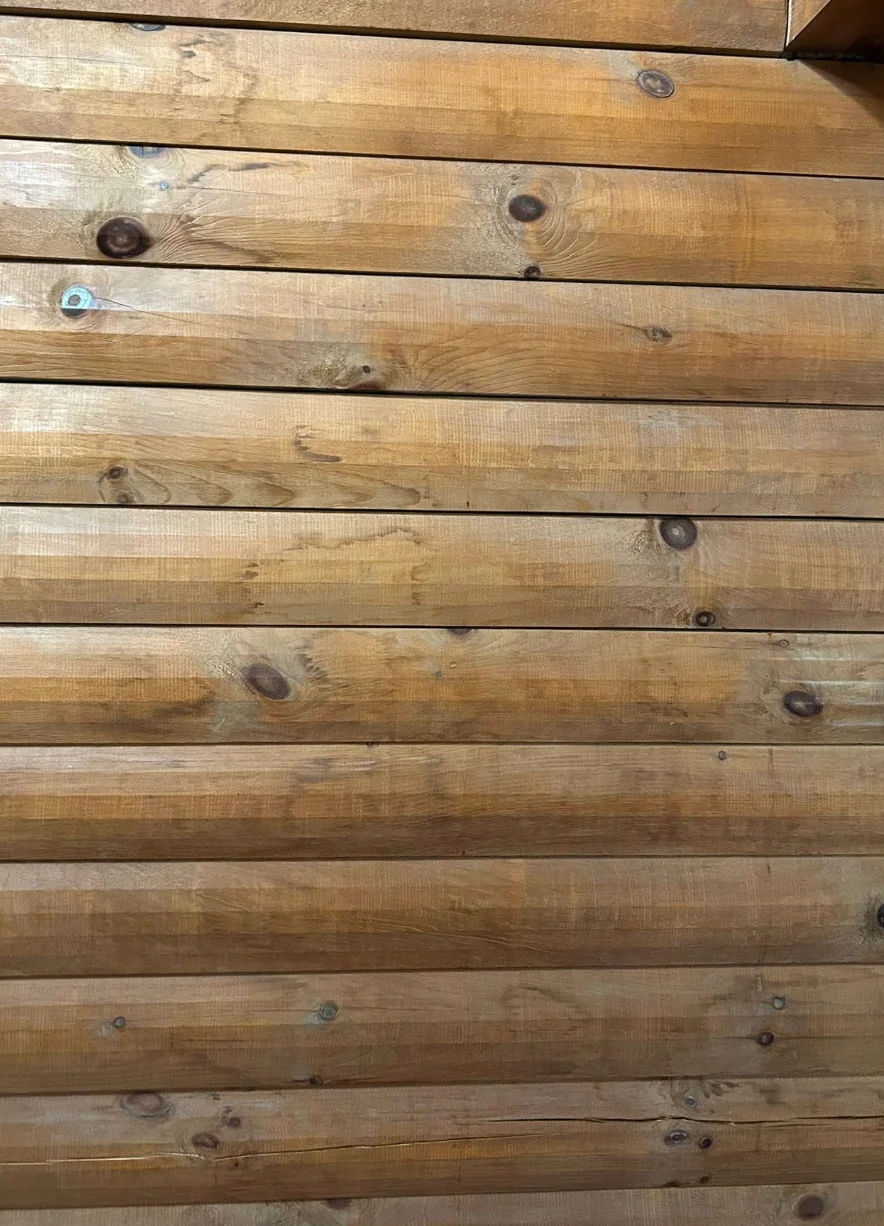
D-log interior wall with widespread water staining: The flat-milled interior faces of these D-logs reveal the full extent of the water damage. Each horizontal joint between log courses shows discoloration where water has seeped through and deposited dissolved wood sugars and tannins. The darker bands along the bottom edges of each log mark where water pools against gravity before evaporating, leaving behind concentrated extractive deposits. This level of staining indicates a pattern of water infiltration over many years.
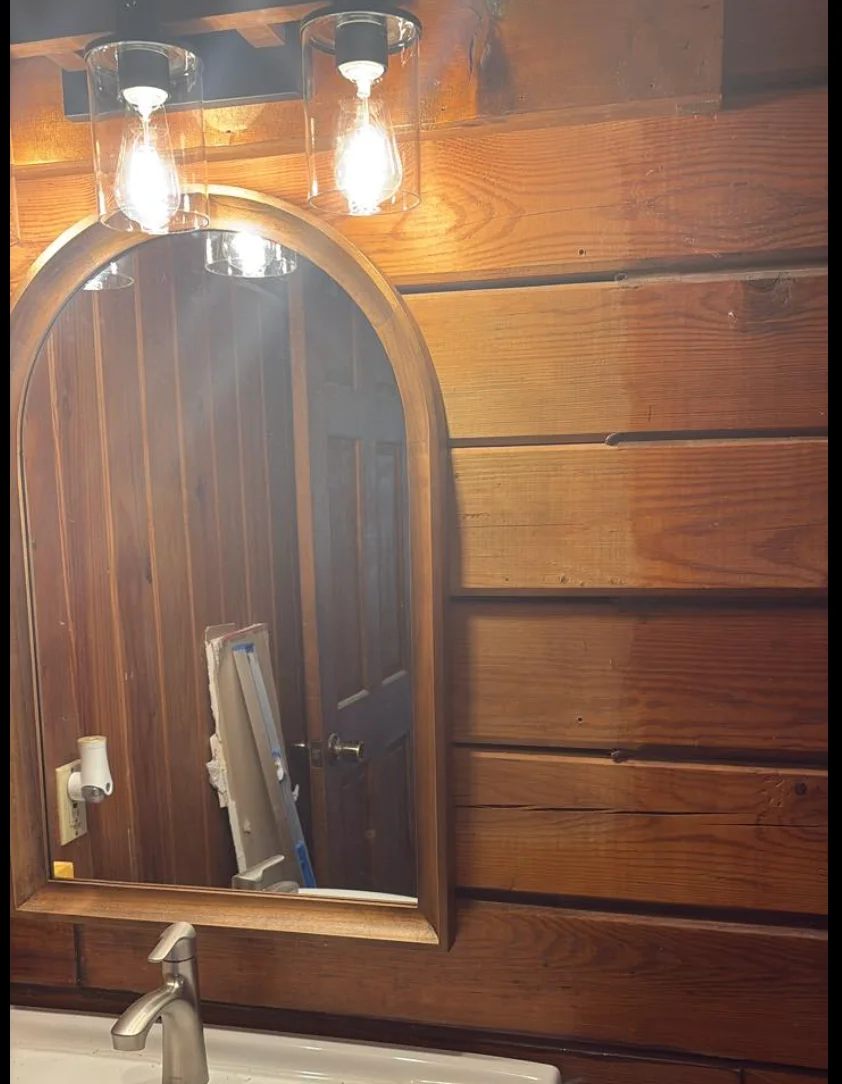
Bathroom D-log wall with interior moisture damage: Bathrooms are especially vulnerable in log homes — the combination of exterior water intrusion and interior humidity from showers and sinks creates a double moisture assault on the logs. Notice the darkened, uneven coloring on the log faces and the visible water marks at the joints. The warm, humid bathroom air creates a temperature differential that can actually draw additional moisture through unsealed log joints from the cold exterior.
Why Simple Cleaning Won't Work: The Stubbornness of Extractive Stains
Before we get into the proper removal process, it's important to understand why the approaches most homeowners try first don't work:
- Wiping or scrubbing with water — This actually makes the problem worse. Adding more water re-dissolves some of the surface extractives and spreads them to a wider area, creating a larger stain with softer edges.
- Household cleaners — Most household cleaners are formulated for non-porous surfaces. They can't penetrate into the wood grain where the extractive deposits have bonded with the cellulose fibers.
- Bleach — Chlorine bleach can lighten tannin stains temporarily, but it doesn't remove them. It oxidizes the color compounds without removing the underlying deposits. The stains typically return darker than before as new moisture mobilizes the remaining extractives. Additionally, bleach damages wood fibers, raises the grain, and can cause long-term weakening of the wood surface.
- Sanding alone — Light sanding can remove surface-level staining, but extractive deposits penetrate deep into the wood grain — sometimes a sixteenth of an inch or more. You'd need to remove a significant amount of material to get below the stain, which changes the profile of the log and can compromise the joint geometry.
- Painting over the stains — Paint will cover the stains temporarily, but the extractives will eventually bleed through most paints and primers. This is known as "tannin bleed-through" and it's a well-documented problem in the paint industry. Even specialized stain-blocking primers can fail when the underlying moisture problem continues to drive new extractives to the surface.
The bottom line: there are no shortcuts. Properly removing interior water stains from log homes requires a systematic, multi-step approach that addresses both the stains themselves and the conditions that created them.
The Complete Water Stain Removal Process: A Multi-Step Solution
Removing interior water stains from a log home is a labor-intensive, multi-day process that requires professional-grade products and techniques. Here's the process we use, step by step:
Step 1: Assessment and Source Identification
Before touching the interior stains, you must identify and fix the source of water intrusion. There's no point in removing stains if water is going to re-enter and create new ones within months. The assessment includes:
- Inspecting the exterior for failed caulk, missing chinking, deteriorated stain, and open checks or gaps between log courses.
- Checking all flashings — around windows, doors, roof-wall intersections, and deck ledger boards. Flashing failures are one of the most common entry points for water.
- Using a moisture meter to map the moisture content of interior log surfaces. Areas with elevated moisture readings (above 15-16%) indicate active water intrusion paths.
- Examining the foundation and lower log courses for splashback damage and ground-level moisture wicking.
- Assessing the severity and depth of interior staining to determine the appropriate removal method for each area.
Step 2: Exterior Sealing (Fix the Source First)
This is the step most homeowners skip — and it's the most important one. Before any interior work begins, the exterior must be sealed to stop water from entering the wall system. This typically involves:
- Applying chinking between all log courses — Yes, even on homes that were originally sold as "chink-less." After years of settling and shrinkage, these homes need chinking just like any other log home. A flexible, high-performance chinking product like Perma-Chink or Sashco Conceal is applied to every horizontal joint to create a permanent, flexible seal.
- Caulking around all penetrations — Windows, doors, electrical boxes, hose bibs, and any other penetration through the log wall must be sealed with a compatible log home caulk.
- Sealing exterior checks — Any upward-facing checks (cracks in the log surface) wider than a credit card thickness should be sealed with flexible caulk to prevent them from collecting and channeling water.
- Restaining the exterior — If the exterior stain has failed, the logs should be cleaned and re-stained to restore the water-repellent barrier.
Once the exterior is sealed and you've confirmed with moisture meter readings that the wall system is drying out, you can proceed with interior stain removal.
Step 3: Chemical Stripping — Breaking the Bond
The first step in removing the actual stains is chemical stripping. This uses specialized wood restoration chemicals designed to dissolve and neutralize the extractive deposits:
- Oxalic acid-based wood brightener — Oxalic acid is the gold standard for removing tannin stains and iron tannate discoloration from wood. It works by chemically reducing (breaking down) the dark-colored tannin compounds and dissolving iron oxide deposits. The solution is applied to the stained areas, allowed to dwell for 15-30 minutes, and then neutralized.
- Sodium percarbonate cleaner — For heavier staining with organic matter (mildew, mold, or biological growth), a sodium percarbonate-based wood cleaner is applied first. This oxygen-based cleaner lifts embedded dirt and kills biological organisms without the harshness of chlorine bleach.
- Specialized log home strippers — In cases where the existing interior finish (stain, varnish, or polyurethane) must be removed to access the stained wood beneath, a chemical stripper designed for log homes is applied. Products like Sashco's Transformation Log & Timber Stain Stripper are formulated to remove finishes without damaging the underlying wood.
Important note on interior chemical work: Chemical stripping indoors requires extensive preparation — covering floors, furniture, and fixtures with plastic sheeting, ensuring adequate ventilation (opening windows, using fans), and wearing appropriate respiratory and skin protection. The chemicals involved are effective but require careful handling.
Step 4: Sanding — Removing the Stained Layer
After chemical treatment, sanding is required to remove any remaining discoloration that the chemicals couldn't fully dissolve, and to prepare the wood surface for a new finish. Interior sanding on log homes is painstaking work:
- Contour sanding — Unlike flat walls, log surfaces are curved. Swedish cope and D-log profiles require specialized sanding techniques. On the rounded portions of Swedish cope logs, a flexible sanding pad or contour sander is used to follow the curvature without creating flat spots.
- Progressive grits — Sanding begins with a coarser grit (60-80) to remove the stained surface layer, then progresses through medium (100-120) and fine (150-180) grits to create a smooth, uniform surface. Each grit removes the scratch pattern from the previous one.
- Detail sanding — The most time-consuming part is sanding the joints, corners, and tight areas where the copes or tongues meet. These areas trapped the most water and often have the deepest staining, but they're the hardest to reach with power sanders. Much of this work is done by hand.
- Dust management — Interior sanding generates enormous amounts of fine wood dust. A dust collection system attached to the sander is essential, along with plastic barriers isolating the work area from the rest of the home. Even with dust collection, cleanup after sanding is extensive.
Step 5: Media Blasting — For Severe Cases
In severe cases — where staining is deep, covers large areas, or has been left untreated for many years — sanding alone may not be sufficient or practical. In these situations, interior media blasting is the most effective option:
- Crushed walnut shell or corn cob media are the preferred blasting media for interior work. These organic media are softer than glass or sand, which means they remove the stained surface layer without gouging or damaging the underlying wood. They're also biodegradable and don't leave harmful residues.
- Controlled pressure — Interior blasting is done at much lower pressure than exterior blasting (typically 30-50 PSI compared to 60-80+ PSI for exterior work). The goal is controlled removal of the stained surface, not aggressive stripping down to bare wood.
- Comprehensive containment — Interior media blasting requires complete containment of the work area. Everything — floors, ceilings, fixtures, windows, doorways — must be sealed with heavy plastic sheeting. A vacuum/dust collection system runs continuously during blasting, and a negative air machine is used to prevent dust from migrating to other rooms.
- This is messy, labor-intensive work — and it's the reason interior water stain removal on log homes is not a weekend DIY project. A professional crew with proper equipment can blast and clean the interior of a typical room in 1-2 days, but the setup and containment work adds significant time and effort.
Step 6: Final Cleaning and Neutralization
After sanding or blasting, the wood surface must be thoroughly cleaned and neutralized before any finish is applied:
- All dust and debris are removed with a HEPA vacuum, followed by wiping with tack cloths.
- A final application of wood brightener (oxalic acid solution) neutralizes any remaining alkaline residue from cleaners or strippers and restores the wood to a slightly acidic pH, which is optimal for stain adhesion.
- The wood is allowed to dry completely — moisture meter readings must be below 15% before any finish is applied. In Colorado's dry climate, this typically takes 2-5 days with adequate ventilation.
Step 7: Sealing and Finishing — The Permanent Solution
The final and most critical step is properly sealing the interior logs to prevent future water stain development. This is a multi-component system:
The Interior Sealing System
- Interior stain application: Two coats of a high-quality interior log home stain are applied. For interior use, a water-based acrylic stain provides excellent protection while maintaining low VOC levels for indoor air quality. Products like Sashco Capture or Perma-Chink Lifeline Interior are specifically formulated for interior log surfaces.
- Interior chinking: All joints between log courses on the interior are chinked with a color-matched, flexible chinking compound. This creates a complete air and moisture seal from the inside, complementing the exterior chinking. Interior chinking uses the same backer rod and chinking application process as exterior work.
- Caulking: All gaps around trim, window frames, door frames, and log-to-floor/ceiling transitions are sealed with a compatible caulk. Every potential pathway for moisture or air must be addressed.
- Clear topcoat (optional): In high-moisture areas like bathrooms and kitchens, a clear topcoat over the stain provides an additional barrier against interior humidity and splash water.
When this entire system is in place — exterior chinking and stain, plus interior chinking and stain — your log walls have a complete moisture barrier on both sides. Water can no longer enter from the exterior, and interior humidity can no longer penetrate from the inside. The conditions that created the water stains simply no longer exist.
Why This Is a Professional Job: The Scope of Work
We want to be completely transparent about the scope of this work. Interior water stain removal on a log home is one of the most labor-intensive projects in the log home restoration industry. Here's a realistic look at what's involved for a typical room:
| Phase | Typical Duration | Key Activities |
|---|---|---|
| Assessment | Half day | Moisture mapping, source identification, scope planning |
| Exterior sealing | 2-5 days | Chinking, caulking, stain repair on exterior |
| Interior containment | Half to full day | Covering floors, fixtures, sealing doorways with plastic |
| Chemical stripping | 1-2 days | Application, dwell time, neutralization, drying |
| Sanding / media blasting | 2-4 days per room | Surface removal, detail work, dust management |
| Cleanup and drying | 1-3 days | HEPA vacuuming, brightener application, drying to target MC |
| Finishing and sealing | 2-3 days | Stain application (2 coats with dry time), interior chinking, caulking |
For a whole-house interior project, you're looking at 2-4 weeks of work depending on the size of the home and severity of the staining. This is not a simple cosmetic touch-up — it's a comprehensive restoration project that addresses both the symptom (stains) and the cause (water intrusion).
Prevention: Keeping Water Stains from Coming Back
Once you've invested the time and money to properly remove interior water stains, the last thing you want is to see them return. Here are the key maintenance practices that will keep your logs clean and protected for years to come:
- Maintain exterior chinking and caulking — Inspect all exterior chinking and caulk lines at least once per year, ideally in spring after winter's freeze-thaw cycles. Look for any cracks, separations, or missing sections and repair them immediately. A small breach in chinking can allow significant water intrusion during a single heavy rain or snowmelt event.
- Keep exterior stain maintained — Follow the recommended recoating schedule for your exterior stain system. In Colorado's high-altitude environment, this typically means every 2-4 years on sun-exposed walls. Don't wait until the stain has visibly failed — perform the water bead test annually and recoat when water no longer beads up on the log surface.
- Manage interior humidity — In bathrooms, kitchens, and laundry areas, use exhaust fans to control humidity levels. Excessive interior humidity can drive moisture into log walls from the inside, creating the same extractive migration that exterior water intrusion causes.
- Monitor problem areas — Keep an eye on the areas where staining was worst. If you see any new discoloration — even faint marks — investigate immediately. Catching a new leak early means a simple caulk repair rather than another round of interior restoration.
- Address roof and gutter issues promptly — Overflowing gutters, ice dams, and roof leaks are major sources of water that can saturate log walls. Keep gutters clean, ensure proper drainage, and repair any roof issues without delay.
- Maintain proper grading and drainage — Ensure the ground around your foundation slopes away from the home. Splashback from rain hitting the ground near the foundation can saturate lower log courses and create staining on interior surfaces.
Don't Live with Water Stains — Get Your Log Home Assessed
Interior water stains aren't just unsightly — they're a warning sign that water is infiltrating your log walls and potentially causing hidden damage. The sooner you address the problem, the less extensive (and less expensive) the restoration will be.
If you're seeing water stains on the interior of your Swedish cope, D-log, or any style log home, we encourage you to reach out for a thorough assessment. We'll identify where the water is getting in, evaluate the extent of the staining, and provide you with a clear plan and honest estimate for the complete restoration — from sealing the exterior to restoring beautiful, clean interior log walls.
Our team has decades of experience working specifically with log homes across Colorado's mountain communities. We've seen — and successfully restored — every level of interior water damage, from mild discoloration to severe extractive buildup that has accumulated over decades. Every project starts with understanding the problem and ends with a complete, long-lasting solution.
Schedule Your Free Log Home Interior Assessment
Water stains are telling you something. Let us help you listen — and fix the problem for good.
Call (719) 301-3917 or request a free estimate online


